See the magic – Coveo Recommendations

If you have not gotten a chance to review my other posts that I wrote up based on our experience implementing Coveo recommendations from the scratch, I would strongly advise going through them first.

Post 1 – Was all about visual clues

Post 2 – The real deal

In this post, now that we have gotten all the set up done, I will focus on how to actually get some recommendations to show up to ensure we apply styles, test the filters out and basically yeah see a working version of recommendations. It was not actually that straight forward, but, thanks to couple hands and also huge thank you to @vbernard to help give some awesome tips that helped us force recommendations when everything else failed.

First, when we have the rendering up on the presentation on all our product detail templates where we wanted to show recommendations from Coveo, we started by visiting lot of pages that made sense to the user flow. I had couple of hands, no kidding here, so, basically I read few posts to understand how Coveo recommendations work internally, though it is a black box, it is fairly easy to understand the basic logic behind how it works. So, we attacked it in such a way that it is bent to give us some results.

This is what we did and it worked on our lower environment and started sending recommendations back, you can also choose to use your QA to fire off some tests and automated requests to do the same. We did a bit of both actually – manual go to set of links that emulated various levels of our product pages and an automated hit to several urls as well.

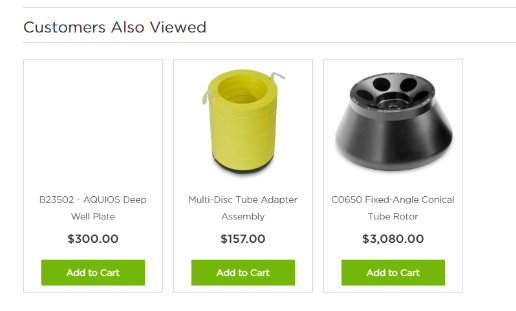
In a nut shell, Coveo recommendations looks for patterns based on history of the end user and suggests what might interest the user next based on the history and matches that it can find from the recommendations model. It is also important to ensure recommendations model has enough data by adjusting the training settings on the ML model. We tried couple different settings there and rebuilding the model after we visited bunch of pages, circling around the products we care about. Finally! We see the below on our recommendations component

We got lucky to be able to test this on lower environments due to multiple hands and effort by the team to emulate what we could, so, we can test it thoroughly with filters on hand. Oh! In regards to filters, we actually needed lot of context based filters, so, we approached this in two fold process –

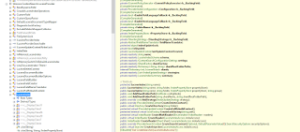
  1. Adding a processor via config to coveoProcessParsedRestResponse, this essentially would add in some additional meta data per result that we need for queries and filters. There is some real good example and documentation loaded here . We followed similar path, but, added our own business logic to load context data needed on our filters
  2. Next up, we added a JS query filter as documented here and used a bunch of expression builders based on all the data we loaded either on processor or via the recommendations view such as current item ID or some miscellaneous information we needed per business requirements on what to show on recommendations and what not to.

Now, I am a true believer of back up plans, if our hardwork to emulate and get the recommendations engine to send us a few recommendations had failed, then, we would have applied styles and do other tests via a hack provided to us by @vbernard from Coveo. Here are the steps to make that work:

Step 1: Add a new pipeline

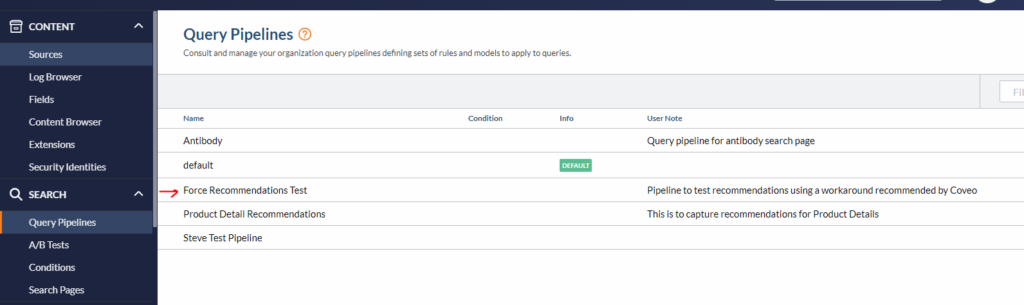
Step 2: Push some featured results to this pipeline

Ignore the cool stones and take a peek at the featured results

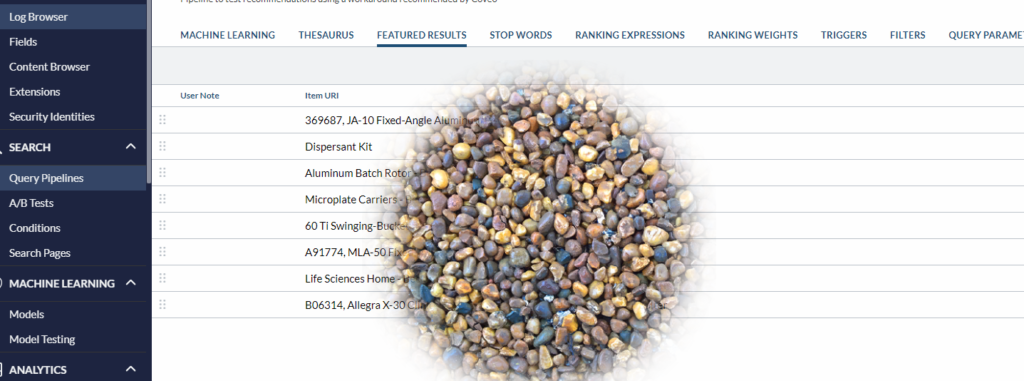
Step 3 : Now go back to ML models and add a recommendations model

Thats it! You should now see the recommendations forced and you would probably see the featured results on your recommendations. Do note though that you should start really small/basic on your view if you are trying to do this forced result approach. In our case, it was kind of hard to use this approach and test what we needed to as we really lean on context for most part. But, probably it might work on basic use cases.

Best Practices for any Sitecore Project

With every new project, the situation is a little bit different, some times you feel like you have the whole time in the world and sometimes time is just not enough no matter what.  It depends on timeline, scope, budget and many many other things actually.

In my recent Sitecore project I am working on, fortunately I am getting enough time to craft and think about every single decision on my way.  This feels so good as I can beautifully craft a solution that is great functionally and from marketing perspective.

With start of every build phase of the project, based on team and project, I make a quick checklist for Developers and team to go over before they submit for code review.  It does not  take a lot of time, but, will go long way to ensure we are implementing Sitecore to take advantage of out of the box functionality it has got, it is important to remember why Clients chose Sitecore and ensure the set up is done right to satisfy their needs, both functionally and from content authoring/Marketing perspective.

Below is one such list and I make effort to keep that updated as the team moves towards attempting complex modules.  The mantra is to build out smaller and keep updating it based on pitfalls you generally see in your team.

  1.  Follow Technical Breakdown as closely as possible, if something should be done differently, please collaborate with Technical lead that had done the breakdown and mention the same, so he/she is aware
  2. Assume that any or every object could be null and ensure null checks are in place on your controller or business logic code.
  3. Minimize code or branching in view, in fact, we recommend to have literally no code, except for simple if statements that would check before editable/property is outputted on the view.  Everything should be available on Model or View Model that is passed and logic should reside in Controller.
  4. Create and check in all sitecore items on to project that the module or feature would need.
  5. Ensure Helix patterns and principles are followed and applied.  Technical breakdown should provide guidelines on the same as well.
  6. Do not forget to set proper Insert Options and Standard values based on functional requirements.  This is a must for a seamless content author experience
  7. Datasource and Data Template are required and is usually specified on datasource driven modules on the Technical Breakdown
  8. All fields such as pickers like Multilist, droplist or Images should be having a source assigned to ensure proper funneled content is shown to content author when trying to load content and keeping media and datasources organized and secured.
  9. Helptext, which are hints for the content author should be added when ever there is back end logic to decide on priority between two fields or specific scenario happens when user fills in a specific content field.  Talk to your Technical lead when in question.
  10. Every thing that is stated editable should be allowed to be editable and unit tested on Experience Editor, consider adding custom experience buttons / Edit frames to edit background images and pop over text when applicable. Other options could be explored if scenario could not be addressed with such easy to configure tools.
    1. If there is a drop list or a picker on content editor, such as theme selection or pattern selection, etc., consider adding a custom experience button to ensure content author could edit the same from Experience Editor.  Refer :  https://community.sitecore.net/technical_blogs/b/maximizing_usability/posts/enhancing-the-page-editor-experience-with-custom-experience-buttons
  11. Ensure your module implemented works on Experience Editor and in fact editable entities are correctly edited and saved via the platform.
  12. Ensure to upload a new image for Thumbnail for ease of use by content author and to look professional and intuitive.  Look in to document uploaded on sharepoint for instructions on how to do the same.  Document Name:  Steps To Upload Thumbnail Image For Rendering.docx
  13. Do error handling when needed and may be a back end service is being used to gather information on controller.  Use methods available on Sitecore.Diagnostics to ensure to push the error to logs, it would be helpful while debugging an issue on upper environments
  14. If there an RTF, ensure a source is set up that pulls up capabilities listed on documentation.
  15. At early stages of the implementation, I would recommend for ease of checking and testing process, the new rendering/module should have at least one set of sample content checked in and this rendering should be added to standard values of Generic Template, a new content page should be instantiated under Home node of the instance and if not dynamic data source, a specific data source should be picked to ensure when the page is accessed the module would show up on the website.
  16. Use the power of Glass to load everything you need on your datasource object or TDS Class, it is easy to extend and tell Glass what type of object you want and map it with few attributes and as simple as that, you get everything you need and controller is clean. Avoid writing code when you don’t have to.

Journey with Helix

Hi There!  With new project I am getting an opportunity to work with Helix patterns, along with leading a team who is awaiting instructions and pointers from me, I am re-inventing and looking at sitecore from a totally different perspective.  Since, the whole sitecore world is moving towards Helix and embracing it, I was bent to take a step forward as well.  I am subtly nervous about this, but, hey, we got a a great team both internally and in community who would pitch in to help us take some decisions.

As I roll along, I plan to share what I learned and how we solved each question/concern that came up while implementing Helix for the first time ever.

Two of them so far.  Below are those noted and steps I took based on recommendations of my fellow super stars.  Do you agree? Do you have some totally different direction that we could lean towards.  I would look forward to getting some different thoughts around this.

  1. Helix does not support base page template and advice to have the page templates inherit from several interface templates instead.
    • Pain point – This would mean, every time there is a need for Global interface template to be added to all page templates, some one has to go to each template and add that in.  Hopefully, if architecture is planned correctly, this should not happen very often, but, yeah, I might have to install powershell for sure to do bulk operations very soon.  I can totally see it.
    • I had no option left at this time other than manually adding couple of those sections that are Global to all templates.
  2. Helix proposes to use a different project per feature/module, but, I guess I agree to use grouping instead to group tightly related siblings(I think you may call it that) in to one project instead.  For example, you have similar looking Hero Slider modules, but, we all know that there is not just one Hero on your website, you will have different flavors for this kind of modules.  So, instead of creating one feature project for each Hero, we tend to group them in to one Feature project instead.  Keeping this balanced, like not abusing it, but, at the same time judging each module case by case basis.
    • In this paradigm, I feel a little confused once in a while especially when Client says any module could be used any where on the site, well technically you could use any module any where on Sitecore, assuming not too many restrictions are placed using placeholder settings, but, saying all modules are Global kind of puts the categorizing in terms of Helix in jeopardy or confused state.
    • What I did to overcome this is – Think about different ways of grouping a module based on name of the module, fields/sitecore items in use for the module, where this module is likely to be used, what is the generic purpose of this module.  Few such questions I answered to myself to give clarity on naming the feature projects.  If the module seems to be really generic and not fitting in to any category, we would then plan to drop it under Modules project.  Again, being careful to not abuse this.

Will definitely bump in to more. Also, cool find, I see that the unit testing feedback provided on Helix/Habitat is pretty cool if you wanna check out

http://helix.sitecore.net/devops/testing/unit-testing.html

Glass Surprise – Get Your Ancestors like a champ

Glass just makes me so happy! I do not have to write same 10-15 lines of code every time to do something very mundane when it comes to Sitecore. Every other feature on sitecore demands some kind of relationship driven items to be accessible from context page on which your module would do some magic on. Typically, developers tend to write their own custom code to do such things which would lead to bad performance when not done right. Why not just go with Glass if you are using it in your instance development? It is far more easier. I had done a similar blog post to grab children from Glass, but, this time around it is Ancestors. Though similar, it could help some one who did not think or know that it could be used on both the relation ships on the tree, upwards or downwards. Steps to do this is quite simple and three step process Declare a custom partial class that extends your auto generated class based on say a template. For example like below. I like to keep these guys organized, usually do it in special Model project and namespace related to it, to keep things easy and manageable, so some one can easily know if the model has been extended. Next up, add a Attribute that comes with Glass such as below, pass your template ID. I actually tried getting this ID from a config setting which would have been great for maintenance, see if you can do that based on your project settings Access the new ancestor strongly typed( A bonus, so you dont need to cast and make a messy view, the view simply get’s what it needs and you access and ensure your checks are in place)

Sample Code Of Custom Partial Class namespace

YourProject.Models {

public partial class Your_Template_Auto_Generated_Clas{

[SitecoreQuery(“./ancestor-or-self::*[@@templateid='{7E6BC980-362C-4BBB-97E5-9DAA83B70812}’]”, IsRelative = true)] public virtual Your_Strongly_Typed_class myAncerstorItem { get; set; }

} }

Voila!

Goal accomplished and the best part clean code, clean views and happy MVC.

Have a great weekend ahead!!!

Custom Sorting on Coveo Facet

I got to use a new feature of Coveo today because of new requirements. How fun, though the request that came through felt not needed and a corner case in terms of user experience. Pushing through limit is what we have to do if you have got super picky clients. 🙂
The outcome is always precious as you get to learn something new. Here is the snapshot of what happened and how we were able to get it working per request and requirement.

Goal – Regardless of selections made on Coveo Facet because of url appending, the sort order of values available on facet stay per the field on which sort is based on.

Problem – The inherent default behavior of Coveo for better UX experience. To be honest, I actually like what they have in terms of grouping the values selected to the top and rest are sorted based on the sort field set up. But, we have to some how overwrite this default behavior.

Firstly, our front end contact explored why this happens and how coveo groups them the way it does inherently. The reason for special attention that these selected values get is because of the below. Thanks to our front end resource to find this out. Though we did not pursue anything in modifying this, it is always good to know the reasons behind how it is currently done.

https://developers.coveo.com/display/public/SearchREST/Group+By+Results

So, the reason is that when there is an appending in URL for a selection of a value or set of values in the facet, Coveo inherently tags these as Desired and hence the special treatment for those to be on the top.

For example, if your URL is like below may be because the user clicked on back button post user selected few values and moved on his journey, the user could land on pages like this or if marketing team linked off the user to a page with pre-selected values on a facet.  There could be more scenarios where your user would bump in to this situation, but to name a few.

Example URL – https://www.domain.com/press-releases-events-and-webcasts-landing#f:articlePostYear=[2017,2018]

The selected would be grouped on top like below due to the above explained reason.

Again, I like what Coveo does inherently and I suspect that this needs to overridden in simple cases, but, if you absolutely need to do this? Which is where we stood, I logged a Q and A below and luckily got a direction.  I only wish there were more graceful options, but, we took what we got as well, we had to overwrite this and there was no other option unfortunately.

If you are curious, follow the discussion here and I will explain more in detail how I actually implemented what was recommended by Coveo team.

https://answers.coveo.com/questions/12071/facet-values-mentionedgrabbed-in-allowed-values-be.html?childToView=12086#answer-12086

Steps I did to Implement this solution:

  1. Created a copy of default Coveo MVC view for facet and named it differently and placed under correct project specific location.
  2. Add the below line to the view created just above end of div tag in place for the facet
    data-custom-sort=”2024,2023,2022,2021,2020,2019,2018,2017,2016,2015,2014″>
  3. Note – With addition of this, we should be good on sorting with lower limit of 2014 to upper limit of 2014, based on your project data you could decide on good numbers for these limits. Only deal is post 2024, if this project has same implementation, we will need a code deploy to ensure sort works as expected.
  4. Use this new view item on presentation for the facet and select all appropriate values that a coveo facet would need on the templates affected or will use such type of facet
  5. That is it!! Post this change regardless if values are selected via url or not, the ordering will be based on data-custom-sort.

Coveo Sorting Part 3

Hey There!

This time soon enough, I really wanted to complete my thoughts on Coveo sorting.  We so far learnt two main things from the previous posts.  How to accomplish Coveo Sorting on a typical custom coveo rendering on a sortable field and how to make sorting work when you have Coveo Tabs that list the results out.

Next step, we will learn how we can achieve the same on Java script, there are few situations where this would come in handy.  In my example, what I was trying to do is apply Coveo Sorting on a computed field.  We are all aware that a computed field is in memory and hence we do not have a GUID we could use to work around the active issue which was present on adding default sort order to Custom Coveo rendering.  With out GUID, the sorting will not work on the rendering due to the issue, this would not be a problem if you are using latest version of Coveo, but, in our case we had no option, but, to battle this challenge.

A option that you could achieve sorting via javascript was the key to successfully getting the sort to work on a sortable computed field.

Below are few resources that helped me get started.

https://answers.coveo.com/questions/1658/how-can-i-set-the-default-sort-order-using-the-jav.html

Below is the code snippet that I plugged in my Custom Coveo View which needed the default sort order to be set

CoveoSortComputed.PNG

Do note that you have to set this in function, so, the properties get set properly and applied on XHR request. Mission accomplished.

Now, I covered all the ways that we applied Coveo sorting on different style components. Another cool thing I noticed if it helps some one is that even if your field is of type Date, do not use that option for Default Sort Order. Just use Field as your type and all is working as expected.

Happy Problem Solving people. Enjoy your rest of the weekend! I am actually blogging from SF airport after hogging on organic veggie quesadilla. 😉

Coveo Sorting Part 2

Hi There!

Welcome back again to my three part series of sorting with Coveo.
This time, we look more deeper in to how to make your tabs have a sorted list, below are few easy steps you will need to do make sorting work on Coveo tabs.

  1. Ensure you have a Sort Component added to your presentation.  If you do not do this step, the Default sort order you would enter on Coveo Tab Component would not work and could also lead to exceptions on console.   Read more details about Coveo Sort Component here if curious https://developers.coveo.com/display/public/JsSearch/Sort+Component;jsessionid=6D194F8CCE1AC89DDB1B92C50E446CFF
  2. See screenshot below to see how a Coveo Custom Sort View would look like.
  3. Ensure you plug in the same Default Sort Properties you have defined on your Coveo Custom Tab, which means you should match Sort Order, Field and Order exactly to same values on both your components for the sort to work fine.
 Shown below is the view of Custom Sort View that goes hand in hand with Coveo Tab
SortView
Shown below is the Sort Order Default defition on Coveo Sort View
CoveoSortView
Shown below is the Default Sort order properties on Coveo Custom Tab view. Notice how they are exactly the same, except that on the below we have to use GUID to overcome an existing bug on version of Coveo we are using.
CoveoTabSortOptions
That is it, after this steps, publish your changes and go to the page where you have coveo renderings with tabs, you will now see two things. One, your sort options will be appended to the URL by default and you can also confirm the parameters passed on the Network tab in the XHR request.
If all is well, you now have your sort order working on Coveo Custom tabs.

Helix/Habitat for TDS Setup Steps

The buzz around is that Sitecore is heavily pushing for Helix/Habitat and making it a standard.  If you have not already read through the core concepts, there is some awesome documentation that can you started here on Helix concepts –
http://helix.sitecore.net/Now, once you read through this, I bet just like me you will be tempted to get a copy for yours. I use TDS for my everyday chores, so I got mine from here –
https://github.com/HedgehogDevelopment/Habitat/tree/TDS

Fun fact: Habitat team maintains two trees of the sample project for Habitat, one for TDS and the default one uses Unicorn.(https://github.com/Sitecore/Habitat)

I really wanted to play with this after reading through bits and pieces of the information and would like to share my experience of setting Habitat on my local with you all.

I am ready to get started with Habitat, are you ready?

First things first,  get the repo from the Githib for TDS Habitat.  Please note, the clone URL setup on the github is not cloning the TDS version(may be not setup correctly, I will log a comment).  So, for now, please click on Download Zip instead of cloning the repo to continue with local set up.

After this step, I got some serious code on my local.   For the next step, I needed SIM which I already had on my machine, so went straight for it.  I went ahead and installed a fresh Sitecore Instance 8.2, Update 1 per recommendation.  Not sure if it is my internet connection, it did take some time. 🙂

Next step is to install webforms for marketers.  You can get this as a package specific for the sitecore version and can install through the site once it is up.  In my case here is the version needed for Sitecore 8.2, Update 1

https://dev.sitecore.net/Downloads/Web%20Forms%20For%20Marketers/82/Web%20Forms%20For%20Marketers%2082%20Update1

Important point to note here – When you install WFFMModule from link above, do not think it is a sitecore package, unzip the folder and choose the one based on your server environment, mine is obviously local so I picked the basic package for install.  After zipping pick the one highlighted below when installing from Sitecore Package Installer.


After this step, please rebuild the whole solution and ensure there are no errors.  Then, right click on your solution and select deploy.  Quick note on deploy, It takes a while as there are lot of solutions and lot of items to deploy, it did time out for me once, I did a redeploy and it worked.

Login to sitecore admin(admin/b) and Publish the site.  Go to your local URL and ensure the site is up and running(screenshot below).  Now, for the next steps, I will explore the solution and excited to see what Helix/Habitat could do for us. 🙂

Sitecore Schedule Tasks – CM/CD Environment

I recently had to set up sitemap on CM/CD environment where we had the typical sitecore configuration one CM and two load balanced CD servers. 
I wanted to run some experiments to see optimal items and configuration needed to ensure both CD’s have the sitemap.xml auto generated. 
I did this because I was curious to know why folks said we need multiple same scheduled tasks one for each server node.  I was definitely positive that I can pull this off with just one scheduled task across all environments.  Turns out, I was over ambitious!
Below are the experiments I did to content my curious brain. 
Case 1 –  Only one task across all environments

My ambitious drive of making it work with just one scheduled task, in our patch file where we have the path for scheduled tasks defined which would be incorporated on showconfig, I ensured that all the servers pointed to the same path. 
For example – 
     <agent type=”Sitecore.Tasks.DatabaseAgent” method=”Run” interval=”00:10:00″             name=”Master_Database_Agent”>
        <param desc=”database”>master</param>
        <param desc=”schedule root”>/sitecore/system/tasks/schedules/CM</param>
        <LogActivity>true</LogActivity>
      </agent>
Results 

Post this setup, all is well on CD1, the sitemap was generated and by the looks of it covered all URL’s of items in content and protocol was followed fine as well per setup. The issue is the CD2, turns out sitemap is not updated on this server. 
I checked the logs on CD2 to see if there was an error, there were none related to sitemap generation, but, one thing I did notice on the logs is that – every time I would see that the schedule specific to refreshing sitemap would come back as not due. 
In the logs, I would see entry like below – 
ManagedPoolThread #3 18:19:38 INFO  Scheduling.DatabaseAgent started. Database: liveweb
ManagedPoolThread #3 18:19:38 INFO  Examining schedules (count: 1)
ManagedPoolThread #3 18:19:38 INFO  Not due: Refresh XML Sitemap
ManagedPoolThread #3 18:19:38 INFO  Job ended: Web_Database_Agent (units processed: 1)
This would mean that every time the scheduling agent runs it finds out the task has already been run per schedule and does not run it any more. 
Case 2 –  One task per server 

Now, the case which I did not wanted to do, I always strive to avoid duplication which would mean more management and more configuration, but, I had to test and ensure load balanced servers have sitemap served properly when crawlers do their stuff. 
What I did to test this case is to duplicate the scheduled tasks one for each server, so on my master database I would have three different nodes and scheduled tasks and on each server the path on configuration would be different as well. 
On CD1 – 
 <agent type=”Sitecore.Tasks.DatabaseAgent” method=”Run” interval=”00:10:00″ name=”Web_Database_Agent”>
        <param desc=”database”>liveweb</param>
        <param desc=”schedule root”>/sitecore/system/tasks/schedules/CD1</param>
        <LogActivity>true</LogActivity>
      </agent>
On CD2- 
<agent type=”Sitecore.Tasks.DatabaseAgent” method=”Run” interval=”00:10:00″ name=”Web_Database_Agent”>
        <param desc=”database”>liveweb</param>
        <param desc=”schedule root”>/sitecore/system/tasks/schedules/CD2</param>
        <LogActivity>true</LogActivity>
      </agent>
 Results – 
In this scenario and setup, everything works well and servers are happily serving the most updated sitemap.xml 
So, the bottom line is,  if you want a task to run on all servers at least once and can not possibly live with running just once regardless of which server it ran on, then, we need to duplicate and there seems to be no option. 
Do you all have any other ways to make this work with no duplication of tasks when both load balanced servers are pointing to same database. (web)?
I would be super curious to know, do post comments or suggestions. 

Coveo Zero Results Issue

First, based on project requirements on Coveo version you have installed all Coveo components, hooked up your sitecore to use Coveo and all is well on Diagnostics. All components are Green.

Now, you drop or use newly and successfully built index for your search queries, you get zero results back.
Why would it return zero results, is it picking incorrect index? Are my configurations fine? Then you go the good old CES console to see if there are any errors.  Except for query returning 0 results, there are no errors.
But, I note this on the CES console –

Query (@fz95xlanguage76852==”en”) (@fz95xpath76852==3ab17f3f16be4a018105ecade4380857) (@fz95xtemplate76852==f5cc486b394c40ff8320480ec7c650a7) performed by extranetAnonymous [Sitecore Security Provider for blah-blah.com]. 0 results in 0.016 seconds.

I copied the query and ran it in Index Browser on CES Administration tool.  It did return loads of results.  So, it is not data, it is there for sure and query is correct as well.

Seems like the query was run by Anonymous user.  So, few check points to ensure this is not permissions issue.

  1. Ensure extranet/anonymous user on sitecore instance have read permissions on the content tree 
  2. Go to Index Browser and run the query above, go to any of the search results and look for permissions tab under Details.  It should show who all have access to this item.  
  3. You should see ‘Anonymous’ there.  If Anonymous is not there, that could be a problem and which is why the results come back as ‘0’.  I did not see this user in permissions and started scrambling on what I can do to fix this.  I came across the below blog 
The problem stated there looked exactly like mine.  I did the last step which is to clear caches on Details Tab under content security and once I did that, I could now see anonymous under permissions in individual documents. 
All is well and no more empty results. 
Query (@fz95xlanguage76852==”en”) (@fz95xpath76852==3ab17f3f16be4a018105ecade4380857) (@fz95xtemplate76852==f5cc486b394c40ff8320480ec7c650a7) performed by extranetAnonymous [Sitecore Security Provider for blah.com]. 203 results in 0.031 seconds.

Debugging CD issues – No matching constructor was found

Most of the times, when you set up a CD server at some point or the other.  You will see errors like ‘No matching constructor found….’
These nasty errors are hard to debug specifically if you have bunch of complex third party system’s interacting with your sitecore instance. I encountered something like this while setting up our pre-production environment with load balancer going on.  If you choose to do trial and error, these errors could take for ever to resolve.  
I applied a strategy and that seemed to get me to the problem more quickly.  Also, I felt the strategy is generic, so, it could be applied to any error similar to this kind.
 
So, here is the error I had to battle – 
Could not create instance of type: Sitecore.ContentSearch.LuceneProvider.LuceneIndex. No matching constructor was found.
 
Here are the steps I took to resolve this.  Hopefully, it will help some one scrambling for a resolve. 
 
Go to sitecoreinstance/sitecore/admin/showconfig.aspx and ensure there are no references to ‘master’ any where, since this is a CD after you enable Switch master to web config and you did a good job at it, you should not be seeing any references.  If you do, then, revise your config. 
 
After you eliminate #1, check for which constructor it is is complaining about.  In my case it was Sitecore.ContentSearch.LuceneProvider.LuceneIndex.  So, I pulled up the *.dll specific to this that comes with Sitecore installation using reflector. 
 
If you notice – there are three constructors I could see from what reflector has to say –  In this case the below:
protected LuceneIndex(string name);
public LuceneIndex(string name, string folder, IIndexPropertyStore propertyStore);
public LuceneIndex(string name, string folder, IIndexPropertyStore propertyStore, string group);
 
Next, I opened up sitecoreinstance/sitecore/admin/showconfig.aspx again and went through all entries on the config that inherit or have provider listed as Sitecore.ContentSearch.LuceneProvider.LuceneIndex to check and see if they are passing the params to adhere to one of the three the *.dll supports.  
 
There were only about nine references, so, it was not such a pain to see each of those to compare.  I found one entry that was not passing params per expectation.  You should also see from which patch file this entry is coming from.  Thank you Sitecore.
 
I deleted that entry as I did not need it as the original config file from which this index was originally defined was disabled per Sitecore set up instructions.  But, in your case if you need that entry, ensure you are passing in params that would match atleast one constructor. 
 
That’s all!! Error behind us and I could go back to sleep peacefully.  This strategy could be applied to any error you will face.  The fact is trial and error is not so much fun and application of clear strategy shows you understand what you are doing. 
 
Hope this helps someone!!!

Say Hello to Glass!!!!

Wanted to share something cool and powerful.  Not sure if you all are already aware, but, pretty awesome, so wanted to share regardless.

Goal – “To get descendants under an item in the content tree that are of specific template ID “
Many straight forward ways to achieve this. Like loading a VM on controller or a new property by casting and doing bunch of queries.
We are close to a launch and typically at this time, more code would mean more bugs and additional effort to resolve those.  I wanted to avoid this as much as possible. 

So, I tried loading what I needed through Glass like below.   That is it, Just two lines of code and everything loaded as I wished for. J
No casting, no object massaging, nothing at all.   So cool and yet so powerful.  It could come in handy for you all when working with hierarchical data.
 [SitecoreQuery(“.//*[@@templateid='{A5617868-1226-4C7F-89A7-C7355BD1532A}’]”, IsRelative = true)]
       public virtual IEnumerable<MyTemplate> itemsOfMyTemplateUnderCurrent { get; set; }

Glass documentation helped me get a clue, but, it was more about children only and also note for some reason the sample format given by Glass did not work in case of descendants atleast. 
Notice the {} around GUID of template, my second try and wohoo!!! everything loaded in the object as I needed and wished for. 

Helpful reference:


Make Coveo For Sitecore work on Authenticated Sitecore URL

You have your Sitecore Instance URL protected.  Why? Many organizations do this to protect their under development site to be indexed or even worse seen by search engines and obviously you dont want any one who knows the URL to actually access your not so ready site or worse add a reference link or something.
So, yes, it is very common to have this kind of set up on lower environments while development is in progress.  It could be to share this URL with selected Clients for UAT or content load in some cases.
You have Coveo for Sitecore installed on this Sitecore instance that you protected using IIS authentication.
The Problem – “Coveo For Sitecore will not work – Diagnostics will fail 401, Index rebuilding will not work(401 again!) and obviously your renderings will not load as Indexes are not built yet”
Solution – While scrambling for a good solution and still leave the Sitecore Instance URL protected, we actually did find more than one solution through various unrelated sources and one from Coveo team as well . 🙂

Hopefully, this will help some one who is still scrambling and unable to find a solution.  Select which way to implement and go with based on your usage of Coveo Indexes.

  1. If your project uses plain old Coveo renderings and not use Coveo Indexes from Sitecore content search – You can choose to add another IIS site on CD server and point that to the same site, use this URL(internally open and no auth) to manage your coveo indexes. 
  2. If your project accesses Coveo indexes from code and content search – #1 wont work and will cause 500(Coveo rest end point to pull index will error due to 401 again). In this case, you have two options 
    • Disable IIS basic auth and use IP whitelisting for security instead as our infrastructure thinks this is a possible
    •  Keep IIS Authentication enabled on all folders of the Sitecore instance except WebsiteCoveorest and Website/Sitecore Modules/Web/Coveo 
Have fun Sitecoring and Coveofying your search. (New word..lol)


New Items not Indexed on Coveo

New Items Not Showing Up on Coveo Indexes

You have set up everything alright.  All Coveo components are green, your search renderings show up fine on UI.  All is set! You are a rock star. 
You notice something really wierd, updates on sitecore content items show up fine on Coveo Indexes, but, new items added are not showing up on Indexes until you manually rebuild them using Indexing manager. Well, this is a problem we can not live with as we can not ask Content authors to actually rebuild indexes everytime they add a new item.  Bad solution!
Have to resolve this for sure, there is no option. 
Below are the check points I made – 
1. Check the logs for errors
2. Ensure on showconfig.aspx, Coveo index sync strategies are set up fine OOTB one’s are perfect in most cases. 
3. Check CES console for any errors
4.  No luck so far, everything looks perfect. 
5. Next resort was CES Admin Tool, I  used localhost:8081 as I was debugging on my local. 
6. Dates looked pretty off and outdated, so, I tried to turn off and turn on Live Monitoring
7. Re-opened CES console and added new item
8. Voila!!! new items now showed up on Master 
9. Published and yep showed up on Live site too. 
Problem Solved!!!!  Back to being relaxed. 🙂
I posted this on Coveo Questions and Answers too so some one else in my shoes can probably benefit. 

Coveo Facet Slider Across Two Fields

Coveo Facet Slider Across Two Fields

We had a requirement that obviously could not be achieved using OOTB Facet Slider control. 
We were aware of that and did know we need to do some customization.  Just did not realize that there wont be any to none straight forward solution. 
I came up with the below solution though was not heavily confident while re-iterating this to the team, just  felt worth a shot. 
Good news is after a lot gymnastics it did work. 
Goal –  Use Coveo Facet Slider on two fields on the same item.
Challenge – Coveo does not allow number based Multi Value Field on their Index, hidden challenge I can not base Facet Slider on a Multi Value String field either.  So, I am at wall in both directions. 
Solution – Fluke at first and reality the next 
Below are the steps I did
1. Turn off Auto Max/Min Calculation on Coveo facet slider on the layout
              We can have some livable manual entries for Max/Min on layout as they are required if not auto-generated, I will see what I can do here.
2.       Next, grab Max/Min across all Neighborhood’s under the current metro page from back end
3.       I overwrite the max/min of Coveo controls with this back end loaded Max/Min patching on to their exposed events.
4.       Now, the filtering by default could be based on only one field(our challenge) –“In our case Maximum Neighborhood Price”
5    I will have to hijack the rest api call that Coveo makes on slider change to inject this expression along with others it does, so I do not interrupt the inner workings of Slider.  Additional Detail: Used Disjunction available from Coveo query builder expressions