Get your work on to Managed Cloud

release pipeline

If you have not checked out the beginning of my journey with Sitecore Managed Cloud. Please start there to truly understand the basics. Now, if you already know your way around azure and your team has started the real work, you must be real itchy to get some code up there to your azure app services. Let’s roll up our sleeves and just do that.

First and foremost understand the app settings. With managed cloud, it is even more so important to ensure your patch config for settings has the right and expected values to not throw off things you would hardly imagine. Each one has significance and should be paid attention to. For instance, I had incorrect value placed for ‘role:define’ on my CM and it threw off indexing strategies, it was painful to debug. So, do pay attention to all the values. I am putting some samples and some guidelines, but, it all depends again on what your instance need to breathe and do so your right way.

SettingValue
role:defineAny of the below depending on role of the server:
ContentDelivery
ContentManagement
ContentDelivery, Indexing
ContentManagement, Indexing
Processing
Reporting
Standalone
Note – Though ContentManagement is a right value. Depending on your infrastructure set up, you may want to choose ContentManagement, Indexing
env:defineThis is up to you really – depending on how your patch file usage. In my case, I like using them with {envnamerolename}.
Example: PRODCD, UATCM etc.,
search:defineAny of the below:
Solr
Azure
In my case it was Solr
messagingTransport:defineAzureServiceBus
Note – I took a peek at what Sitecore set up for us on this on Managed cloud and ensured we use the same. In UAT, I saw some issues on Marketing automation because I had this value incorrectly set up.
AllowInvalidClientCertificatesYou would think this should be false. But, for some reason it threw off lot of things and Sitecore Managed Cloud team had set this up to be true, so, I left it as ‘True’
useApplicationInsights:defineTrue
with out this logging will not work properly. As you will realize on managed cloud, all logs tie back to Application Insights. So, it is super duper important to have this flag set correctly.
exmEnabled:defineno
Turn this off if not using it. You can always turn this back up when you do choose to use EXM.
aspnet:RequestQueueLimitPerSession25
This value may need to be tuned if you see errors on your logs constantly. Good article
Important application settings to pay attention to

Next step is to set up TDS Web Deploy to ship your code and items to your shiny new Sitecore Managed Cloud instances. You can set this up to be manual or trigger automagically when some one merges to specific branch on Azure Devops. In our case, we had lot of hands at a single given point of time due to super tight timeline, so, we kept this to be manual to ensure we know to make choices depending on the impact. Below are two links that really helped me get through this –

Step 1: Set up TDS project for Web Deploy. Follow the steps here, last step is optional and I do not remember doing that bit. You are good to move to step #2 as long as you see Web Deploy package and PS script in your TDS project bin folder. https://www.teamdevelopmentforsitecore.com/Blog/TDS-5-8-Local-Set-Up

Quick screenshot of where the web deploy output would go on building your solution

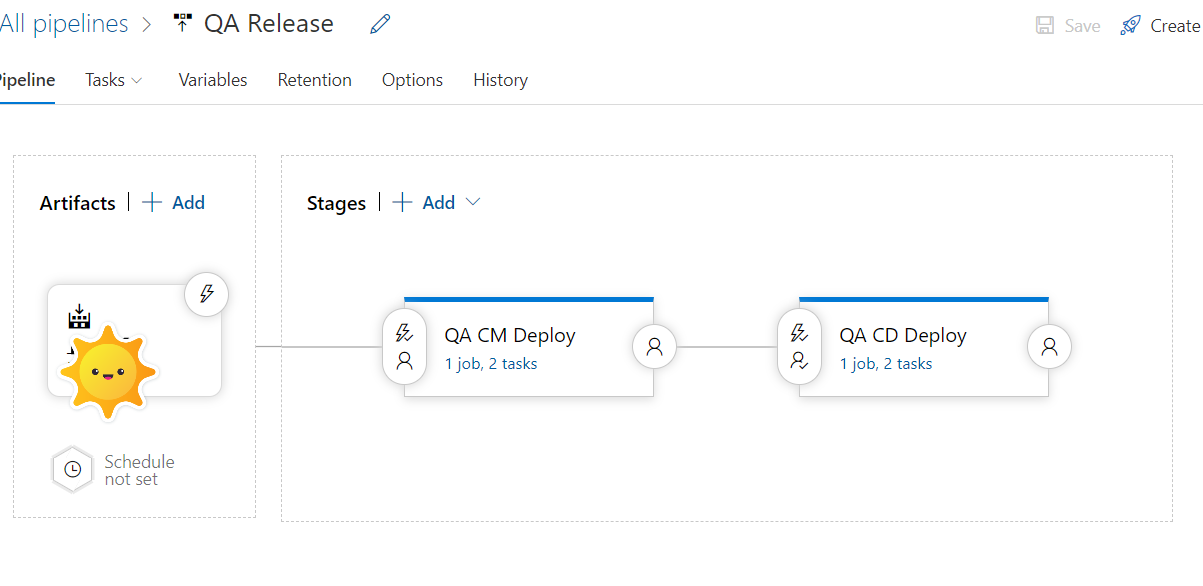
Step 2 – Set up and configure Azure build pipeline and release pipeline. Steps noted here are pretty thorough to get you started

https://www.teamdevelopmentforsitecore.com/Blog/TDS-5-8-Configuring-Azure-Build-Pipeline
https://www.teamdevelopmentforsitecore.com/Blog/TDS-5-8-Configuring-Release-Pipelines

Only catch is in release pipeline set up, you will need Azure subscription. This step is a must to connect to your app service of concern and actually deploy stuff. To get this, you have to do couple things in order.

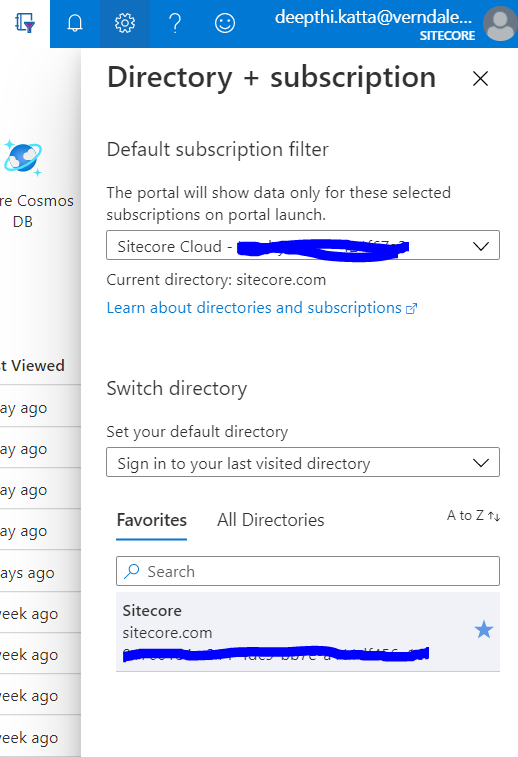
Log a cloud support request titled – “Get Access to Azure – Service Principal”. Give details in regards to your resource group and this type of ticket is usually completed within minutes and you will get information such as below on your ticket.

Note this and keep this handy for next step

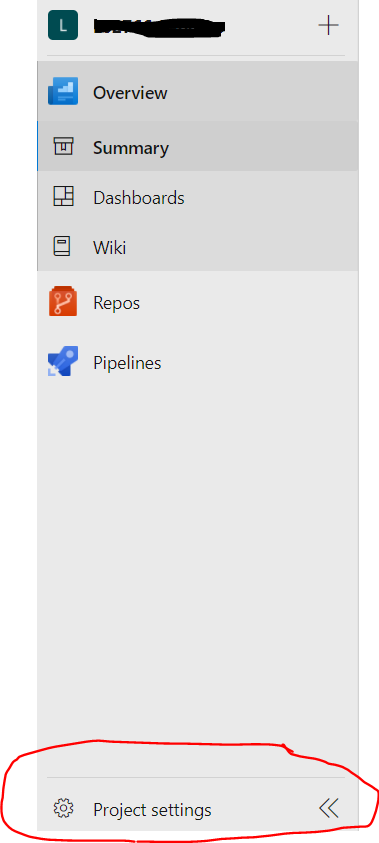
Go to azure devops project and click on Project Settings down below on the left. It is hard to find, so, adding a screenshot.

Project Settings

Next click on Service Connections on left menu, you should now see an option to add a new one. Select Azure Resource Manager and pick Service Principal (manual option) and load it up with all the proper values from support ticket resolution comment. Below is a quick table of mapping that could help you.

Azure Service principleValue/Sitecore Support ticket labelNotes
EnvironmentAzure CloudShould be picked by default
Scope LevelSubscriptionShould be picked by default
Subscription IdSubscription IdYou can also get that from Publish Settings File – Subscription Id
Subscription Namesee notesYou can also get that from Publish Settings File – Subscription Name
Service Principal IdApplication(client)IdThis will be on the ticket – get from label titled as noted.
CredentialService principle keyshould be left option and should be default
Service Principal KeyService Principle Password/API KeyThis will be on the ticket – get from label titled as noted.
Tenant IDTenant IDThis will be on the ticket – get from label titled as noted.
Give it a meaningful Service connection name – I like giving {project name- instance type – last 5 of resource group}

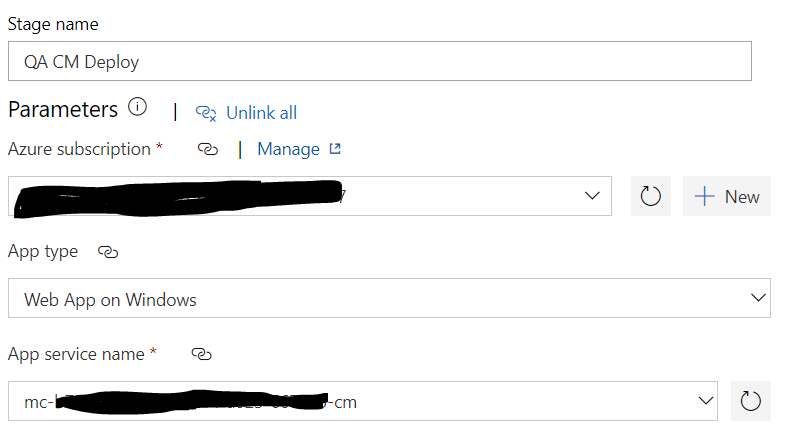
Refresh your azure subscription section on release pipeline configuration and you should now see the new option. Select it and now you should see familiar options of App Services on your resource group under App Service Name field. Select that as well and you are pretty much golden. Follow rest of the steps on links noted above and test your build and release pipelines.

If you were lucky like me and you did all your steps right, you should now see your sweat and blood on Sitecore Managed Cloud instance.

App service name and Azure subscription settings on Release configuration

Next up, we will see some ways to protect your code and items, boundaries as to what are you responsible for and what is Sitecore responsible for, debugging tricks. Stay tuned!

Sitecore Managed Cloud – The Beginning

New Beginning

Towards end of last year, I got an opportunity to lead a project which has to go live in a sprint. Basically, a sprint to architect, develop, test and go live. It was something I thought was impossible even if it is MVP version. But, I took it as a challenge and wanted to see how far I can go along side of my team. We had a real steep learning curve here, below are some of them and of course Managed Cloud stood out because this is the first time I was owning the implementation and deployment on such infrastructure.

  • Sitecore 10
  • Brand new Zodiac/Constellation foundation solution
  • Development team who is new to Experience first paradigm
  • Sitecore Managed Cloud
  • Many many more first time things from front end development team as well

When I am given something new to own, learn and deliver. My first thought is to understand the basics no matter how many hours I have to spend on it. With out this, I have found myself struggle, unable to break walls and move/steer the team and myself with confidence in the past. So, I never do it any other way now, I started there and slowly, but, surely I could see myself gaining momentum.

First things First….

Understanding Terminology and Mapping backwards to knowledge I have based on previous experiences. Below are the steps and notes on every first step I took to get us to where we stand right now. It would really help you if this is your first time like me and you do not have direct mentor who you can reach to internally in your company.

Get in there!

To get access to Azure portal, you first need access to Sitecore support portal “Create Service Requests” section. You should reach to your Sitecore direct contact and request them to get you that. Once, you have that, you should see below section on your sitecore support login. More details on the process on this article.

second section that will appear once you have permission to the cloud organization

You should now be able to create service request to get access to resource groups available on the account. You can read more details about this request on Sitecore’s KB article.
This ticket should be processed mostly instantly and now if you login on your Azure portal, you should see Sitecore in your subscriptions

Sitecore subscription now visible on Azure login

Azure Resource Groups

Alright, you are in. First step is sorted. Now what? If you are like me first time inside Paas based Azure, you are probably lost and there is so much documentation out there, but, sometimes too much of it could be confusing. So, here is what you got to do and understand. Every environment that was created on your subscription, typically one for QA, staging/UAT and production is called ‘Resource Group’. If you have sufficient permissions, you can actually create a service request to set up a new resource group for your needs, this request is called ‘Create New Environment‘. Of course, there could be more created or need to be created based on your contract with Sitecore. We had three of them for this specific client. You can access resource groups from your azure portal by clicking on below.

Ensure you have selected Sitecore subscription before clicking this.
Three resource groups one for each environment on contract

Understand what you see

Now, every resource group would have several resources of several types in them. The first time I saw this, I was like – what are all these? I had no idea and I really wanted to understand these before I go to any further steps. So, I created a mapping of every resource to what it means and what is it responsible for.

view of resource group resources. As you can see there would be around 44 of them of different types

I like to build on what I am familiar with, so, I started here, an article that explains what are the different roles on Sitecore architecture. Pay real attention to ‘scaled XP’. Now, all I had to do is to map everything I see on resources back to that diagram. Visual always helps! This understanding is really important to ensure you know what to expect, how to debug and beyond. I took pain of actually mapping each resource and adding a line or two of what it means. I am sharing it in hopes of helping some one else. Check it out here

Next up is to know how to deploy your code and items.

Did you know – Paas does not support Lucene

So psyched to share this quick piece of info, this is my first time working with a fully Sitecore Paas infrastructure, so, getting to know it more intimately.  I did know that Sitecore Paas comes with Azure Search and Redis cache for instance, but, what I did not know is that Lucene is not at all supported which means that all Lucene related config files were actually disabled on the upper environments that were set up with help from Sitecore.

Reality hit me hard when trying to set up a computed index field that worked beautifully fine on my local, but, completely broke on upper environments.

So, folks out there if you are using Paas pay attention to the index configuration and ensure all the steps listed below were actually completed thoroughly on your Paas  sitecore servers.

https://doc.sitecore.net/sitecore_experience_platform/setting_up_and_maintaining/search_and_indexing/configure_azure_search

Two quick follow up questions that would come to mind, how do I know which type of Search Indexes are used, this is the simple one, look at showconfig.aspx to see what is listed under Index configuration which defines type of Index.

Index Info

The second one which is more important when there is custom search/Index based functionality is, how to ensure locally too Developers are using Azure based Indexes and not Lucene based one’s?  Would love to hear from every one who has experience on this.  This would be an open question for now, hoping to resolve this based on feedback and would potentially reach out to Sitecore to understand what do people generally do for Development in this case.

Happy Sitecoring and hope you are all enjoying your holidays!