In my last blog, we talked about how we could extend xConnect contact facet with additional information and add details to it when a user submits a form for instance. We can check to ensure the data is saved properly by running few quick SQL commands like below.
SELECT TOP (1000) [ContactId]
      ,[FacetKey]
      ,[LastModified]
      ,[ConcurrencyToken]
      ,[FacetData]
  FROM [notimpossible_Xdb.Collection.Shard0].[xdb_collection].[ContactFacets]
  where FacetKey ='SalesforceAccount'
You should see a string in FacetData similar to below. It should match definition of custom facet that was deployed. In my case, it looked like:
{"@odata.type":"#Website.Areas.MyProject.Models.DataExchange.ContactFacets.SalesforceAdditionalInformation","Organization":"verndale test","Industry":"Financial Services","Website":"www.test.com","Involvement":"","SelectedCity":"","ProposedCity":"","AdditionalDetails":"testing preferred key yet again"}Though through above you can check to see if the information you would like is being stored on contact. But, a more elegant way would be to actually see it on a special tab on Experience profile. There are couple blogs out there that can help you with this especially if the goal is to use Speak. But, if you do not care about using Speak, do check out this one. In my case, I wanted to stick with Speak to see how far I could go with this. It was quite a number of steps, but, a combination of resources and special steps helped me get there.
References that helped me:
https://www.konabos.com/blog/extending-sitecore-experience-profile-in-sitecore-9 -> This helped me get started and keep moving in right path till I reached this below. The link noted in there was a lot of information to digest and understand how to proceed next. I wish that area was expounded probably on another blog post. It would have probably helped me knock this down continuing in the same path.

Well, since I was able to come this far, I did not want to give up. I kept looking for something that could lead me to keep moving. I finally found this one that helped me fill in the gaps. This is that magic blog: https://xcentium.com/blog/2019/09/23/view-custom-facets-values-from-within-sitecore-experience-profile
Step #4 on this blog gave me an idea to duplicate the tab and adjust presentation using Sitecore rocks as needed instead of creating brand new items and scramble what should be added to presentation. One gap in this blog which was not mentioned is – when you duplicate the Tab Item, ensure you change references in presentation on new tab item to point to appropriate internal items within the new tab item. For example, below needed to be swapped to ensure I do not break existing details tab and to ensure I show values that I would need to show on my new tab.
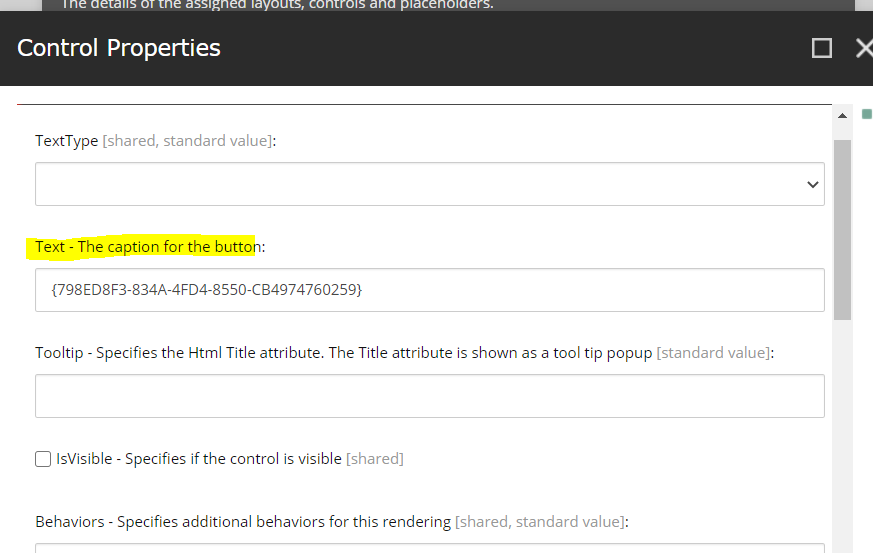
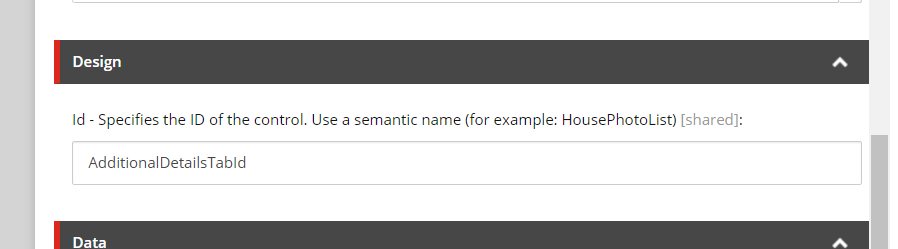

Remember to change ID’s on all presentation components on Tab item. This is to ensure no overlap with existing Details Tab item. If I did not do above, my original details tab was broken and was not working.
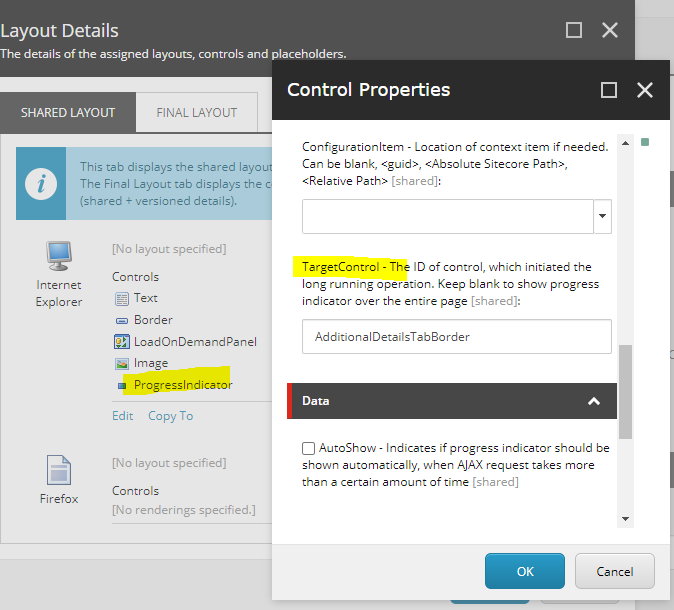
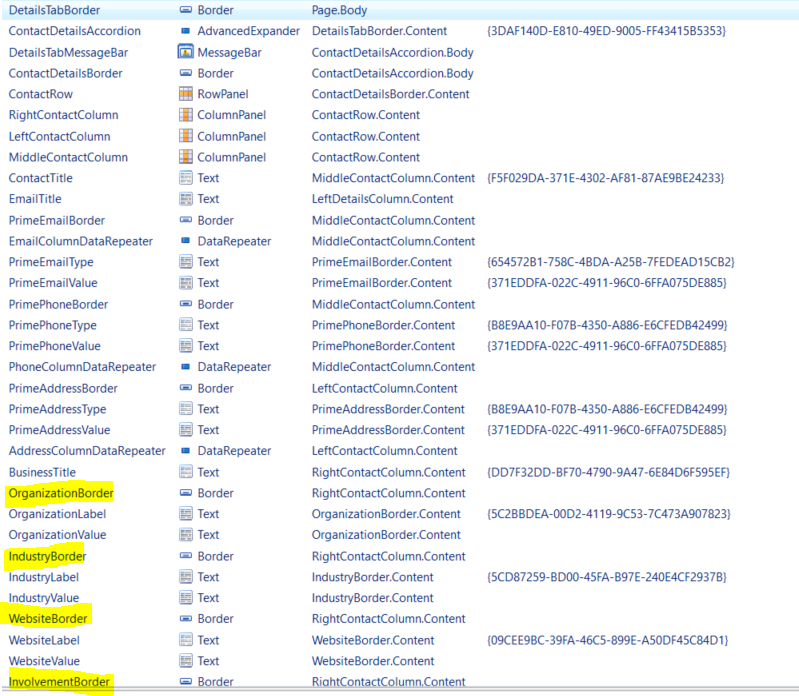
Now that we finished changing presentation of main Tab item, lets move to Details Panel Item which is also based on Tab Template -‘/sitecore/client/Business Component Library/version 1/Templates/Common/Tab’. Open this item up on Sitecore rocks and play with presentation to update/inject new items. Also, ensure to add new datasource items and swap existing references to newly created items under details panel. Finally, my presentation looked like below.
Do not forget to add new label data sources needed. I took inspiration as to where the existing ones are and dropped my news ones in the path below: ‘/sitecore/client/Applications/ExperienceProfile/Common/System/Texts’
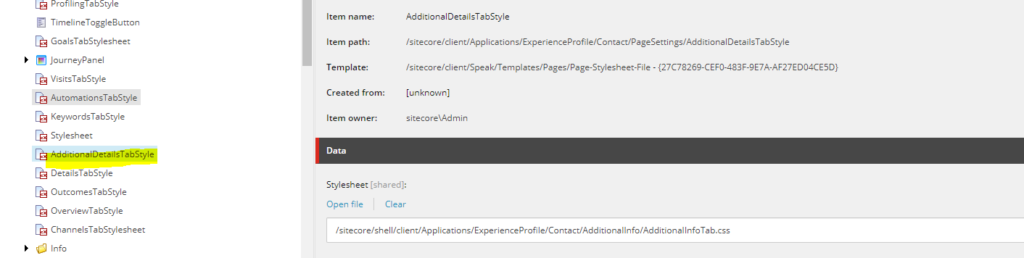
I added additional css needed for this tab by adding a new style sheet item as shown below
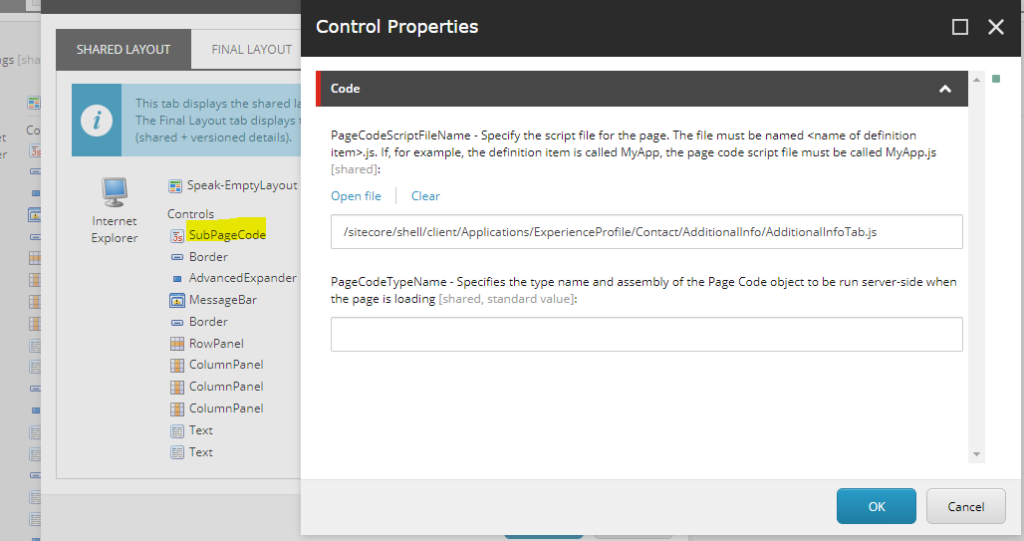
Finally, last step is to hone our js that is needed to make the right calls and read/display from JSON data. To configure which JS to use, edit the Subcode presentation component’s details.
//Here is JS Code for my new tab
define(["sitecore", "/-/speak/v1/experienceprofile/DataProviderHelper.js", "/-/speak/v1/experienceprofile/CintelUtl.js"], function (sc, providerHelper, cintelUtil) {
    var intelPath = "/intel",
        dataSetProperty = "dataSet";

    var cidParam = "cid";
    var intelPath = "/intel";
    var getTypeValue = function (preffered, all) {
        if (preffered.Key) {
            return { Key: preffered.Key, Value: preffered.Value };
        } else if (all.length > 0) {
            return { Key: all[0].Key, Value: all[0].Value };
        }

        return null;
    };

    var app = sc.Definitions.App.extend({
        initialized: function () {
            var transformers = $.map(
                [
                    "default"
                ], function (tableName) {
                    return { urlKey: intelPath + "/" + tableName + "?", headerValue: tableName };
                });

            providerHelper.setupHeaders(transformers);
            providerHelper.addDefaultTransformerKey();
            this.setupContactDetail();
            this.setupContactAdditionalDetails();

        },

        setEmail: function (textControl, email) {
            if (email && email.indexOf("@") > -1) {
                cintelUtil.setText(textControl, "", true);
                textControl.viewModel.$el.html('<a href="mailto:' + email + '">' + email + '</a>');
            } else {
                cintelUtil.setText(textControl, email, true);
            }
        },

        setupContactAdditionalDetails: function () {
            var contactId = cintelUtil.getQueryParam(cidParam);
            var tableName = "additionalcontactinfo";
            var baseUrl = "/sitecore/api/ao/v1/contacts/" + contactId + "/intel/" + tableName;

            providerHelper.initProvider(this.ContactDetailsDataProvider,
                tableName,
                baseUrl,
                this.DetailsTabMessageBar);

            providerHelper.getData(this.ContactDetailsDataProvider,
                $.proxy(function (jsonData) {
                    if (jsonData.data.dataSet != null && jsonData.data.dataSet.additionalcontactinfo.length > 0) {
                        // Data present set value content
                        var dataSet = jsonData.data.dataSet.additionalcontactinfo[0];
                        cintelUtil.setText(this.OrganizationValue, dataSet.Organization, false);
                        cintelUtil.setText(this.IndustryValue, dataSet.Industry, false);
                        cintelUtil.setText(this.WebsiteValue, dataSet.Website, false);
                        cintelUtil.setText(this.InvolvementValue, dataSet.Involvement, false);
                        cintelUtil.setText(this.SelectedCityValue, dataSet.SelectedCity, false);
                        cintelUtil.setText(this.ProposedCityValue, dataSet.ProposedCity, false);
                        cintelUtil.setText(this.AdditionalDetailsValue, dataSet.AdditionalDetails, false);
                    }
                }, this));
        },


        setupContactDetail: function () {
            var getFullAddress = function (data) {
                var addressParts = [
                    data.streetLine1,
                    data.streetLine2,
                    data.streetLine3,
                    data.streetLine4,
                    data.city,
                    data.country,
                    data.postalCode
                ];

                addressParts = $.map(addressParts, function (val) { return val ? val : null; });
                return addressParts.join(", ");
            };

            providerHelper.initProvider(this.ContactDetailsDataProvider, "", sc.Contact.baseUrl, this.DetailsTabMessageBar);
            providerHelper.getData(
                this.ContactDetailsDataProvider,
                $.proxy(function (jsonData) {
                    this.ContactDetailsDataProvider.set(dataSetProperty, jsonData);
                    var dataSet = this.ContactDetailsDataProvider.get(dataSetProperty);
                    var email = getTypeValue(jsonData.preferredEmailAddress, dataSet.emailAddresses);
                    if (jsonData.emailAddresses.length === 0 && email != null)
                        jsonData.emailAddresses.push(email);

                    var phone = getTypeValue(jsonData.preferredPhoneNumber, dataSet.phoneNumbers);
                    if (jsonData.phoneNumbers.length === 0 && phone != null)
                        jsonData.phoneNumbers.push(phone);

                    var address = getTypeValue(jsonData.preferredAddress, dataSet.addresses);
                    if (jsonData.addresses.length === 0 && address != null)
                        jsonData.addresses.push(address);

                    this.EmailColumnDataRepeater.viewModel.addData(jsonData.emailAddresses);
                    this.PhoneColumnDataRepeater.viewModel.addData(jsonData.phoneNumbers);
                    this.AddressColumnDataRepeater.viewModel.addData(jsonData.addresses);

                    cintelUtil.setText(this.FirstNameValue, jsonData.firstName, false);
                    cintelUtil.setText(this.MiddleNameValue, jsonData.middleName, false);
                    cintelUtil.setText(this.LastNameValue, jsonData.surName, false);

                    cintelUtil.setTitle(this.FirstNameValue, jsonData.firstName);
                    cintelUtil.setTitle(this.MiddleNameValue, jsonData.middleName);
                    cintelUtil.setTitle(this.LastNameValue, jsonData.surName);

                    cintelUtil.setText(this.TitleValue, jsonData.jobTitle, false);

                    cintelUtil.setText(this.GenderValue, jsonData.gender, false);
                    cintelUtil.setText(this.BirthdayValue, jsonData.formattedBirthDate, false);

                    if (email) {
                        cintelUtil.setText(this.PrimeEmailType, email.Key, true);
                        this.setEmail(this.PrimeEmailValue, email.Value.SmtpAddress);
                        cintelUtil.setTitle(this.PrimeEmailValue, email.Value.SmtpAddress);
                    }

                    if (phone) {
                        cintelUtil.setText(this.PrimePhoneType, phone.Key, true);
                        cintelUtil.setText(this.PrimePhoneValue, cintelUtil.getFullTelephone(phone.Value), true);
                    }

                    if (address) {
                        cintelUtil.setText(this.PrimeAddressType, address.Key, true);
                        cintelUtil.setText(this.PrimeAddressValue, getFullAddress(address.Value), true);
                    }
                }, this)
            );

            this.EmailColumnDataRepeater.on("subAppLoaded", function (args) {
                cintelUtil.setText(args.app.Type, args.data.Key, true);
                this.setEmail(args.app.Value, args.data.Value.SmtpAddress);
                cintelUtil.setTitle(args.app.Value, args.data.Value.SmtpAddress);
            }, this);

            this.PhoneColumnDataRepeater.on("subAppLoaded", function (args) {
                cintelUtil.setText(args.app.Type, args.data.Key, true);
                cintelUtil.setText(args.app.Value, cintelUtil.getFullTelephone(args.data.Value), true);
            }, this);

            this.AddressColumnDataRepeater.on("subAppLoaded", function (args) {
                cintelUtil.setText(args.app.Type, args.data.Key, true);
                cintelUtil.setText(args.app.Value, getFullAddress(args.data.Value), true);
            }, this);
        }
    });
    return app;
});
Only difference in code between the above and out of the box details tab is the method this.setupContactAdditionalDetails(). This function is wired up to call newly configured end point with tablename ‘additionalcontactinfo’ This is essentially the specific name you have given in your configuration element noted below.
<configuration xmlns:patch="http://www.sitecore.net/xmlconfig/">
  <sitecore>
    <pipelines>
      <group groupName="ExperienceProfileContactViews">
        <pipelines>
          <additionalcontactinfo>
            <processor type="Website.Pipelines.ContactFacets.SalesforceExtensions.ConstructSalesforceDataTable,Website" />
            <processor type="Website.Pipelines.ContactFacets.SalesforceExtensions.GetSalesforceDataActions,Website"/>
            <processor type="Sitecore.Cintel.Reporting.Processors.ApplySorting, Sitecore.Cintel"/>
            <processor type="Sitecore.Cintel.Reporting.Processors.ApplyPaging, Sitecore.Cintel"/>
          </additionalcontactinfo>
        </pipelines>
      </group>
    </pipelines>
  </sitecore>
</configuration>
That is it, if all goes well and you did the configuration and steps mentioned above correctly you should see the new tab loaded with information you need.
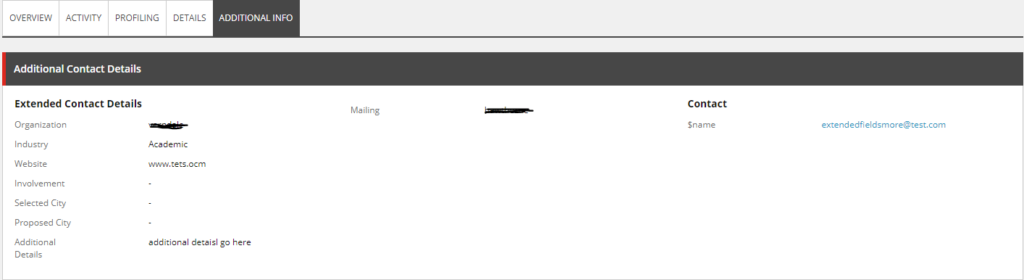
That is it, now I don’t have to open SQL Manager or run a query to check and ensure the data is updated fine in Sitecore when form is submitted with all data or when Salesforce is updated and synced back to Sitecore. Happy and Productive!
Next up, few hiccups post live and how we solved it.