This post is continuation to my last one in regards to first steps, you can check it out here. Now, that you made all the decisions, hopefully all the right ones, then, you would go to the immediate next step which is -“Get it installed and start pushing the data”. Sitecore as always tried their best to provide clear instructions. You will find basic instructions there, but, like always there are few gaps which you can only learn by actually doing it. 🙂
In this post, I will cover few gaps and how I worked around, figured it out and finally got the connector to work.
First and most important thing is you do not have to google to install the packages that are needed for the connector to work. Downloads section on official link of Sitecore Connect actually has all packages. When I was reviewing the installation guide, it lists all of the packages that need to installed and my quick instinct was to do a Google Search lol. I wish Sitecore just added a helpful hint of where to find them to make my life easy. 🙂 But, if you are doing this step, look no further than here
As we follow along the instructions on the guide, one important thing to call out for section 5.2 which is in regards to adding connection string for salesforce in sitecore instance. There is a note right at the bottom of this section and if you are like me may be you will skip right over it and that is why wanted to advise caution to not skip it. 🙂 In my case, I did create a sandbox and I would personally always recommend to create a sandbox for lower environments just to ensure data is kept clean on production instance of Salesforce.

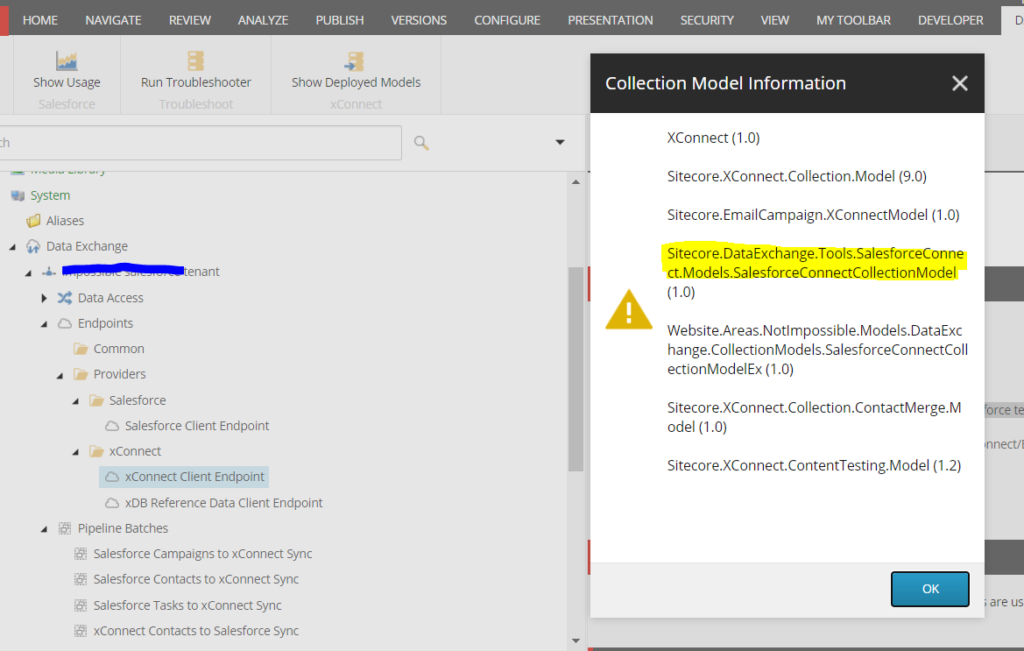
Now, lets say you finished all the steps noted on Installation guide to the tea. But, you quickly find you are stuck at step 5.5. This step is about configuring your endpoints on newly created tenant and ensure the trouble shooter successfully runs. Always remember after model is generated (json file) and it is dropped on locations the guide calls out for, this step below should not be forgotten, if it was, the newly generated model will not be available in ‘Show Deployed Models’ under xConnect Client end point. So, here is the magic step:
“Restart all windows services and do a app pool recycle on IIS xConnect site and your main website instance as well(why not)”
Now, when you click on ‘Deployed Models’ on XConnect endpoint you should see the shiny new model and the trouble shooter will also run just fine. A screenshot for reference:

We all assume to some extent, right? We should not blame Sitecore for assuming we all know that we do that many installation steps and line up several different package installations the assumption is we do a decent size publish to ensure all the good stuff we just loaded gets to web database as well. It is important to do this just in case if there are any dependencies they all make it to destination live database as well.
Now, this bits below took a lot of toll on me because in my case Sitecore instance was not set up correctly on upper environments with regards to xConnect. Had to do some SOLR related corrections. I will not go in to super detail around what happened, but, just on abstract level those indexes and configurations of indexes for xConnect were not done right. But, bottom line for this installation to work as expected below should be ensured and assured.
- Experience Profile should load xConnect contacts with out any errors
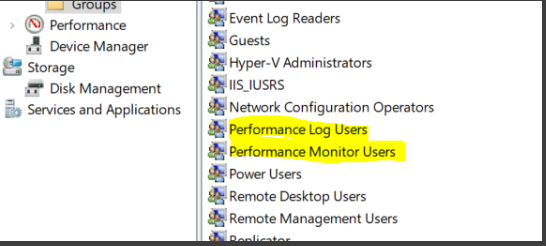
- Ensure your xconnect logs are clean – even basic global key access denied errors should be cleaned upAdd IIS Apppool\xconnectapppool name to performance related groups.
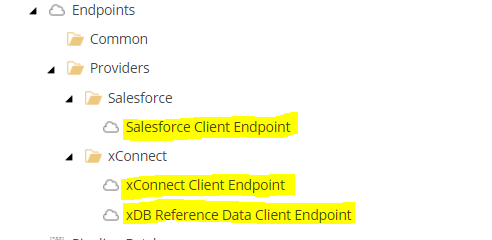
Now, last but not least a pesky little issue that ate more than half of my day. I ensured all steps were a wrap everything was configured per plan, but, when I ran the pipeline batch ‘xConnect Contacts to Salesforce Sync’, nothing happened. Logs generated were super not helpful and almost felt like it failed before even it started. Which brought my attention to end points, but, wait, I just verified that my end points troubleshooters ran fine for all three highlighted below:
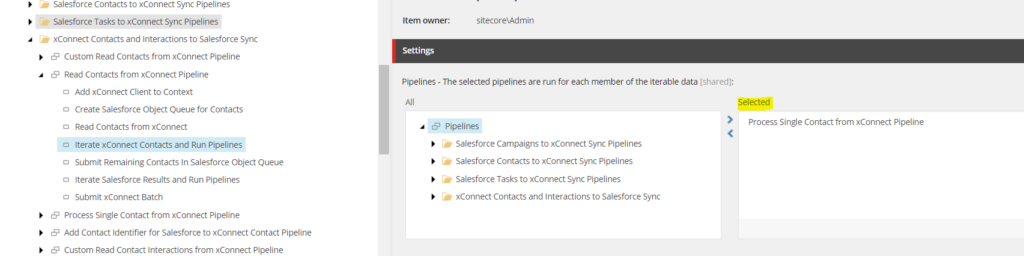
After hours of scrambling, I found that my individual pipeline steps were using branch specific end point references which obviously will fail because we did not configure them, we configured tenant specific end points. The only way I could find this out was using ‘View Raw’ option in ribbon and searching that GUID otherwise from the regular view everything would look alright as the names are same between tenant and branch. I had similar issues for references to other pipelines within pipelines. For instance, the below pipeline step highlighted below was actually from default branch and not from tenant, so, any changes I made to my pipeline step or end point configuration was not being read and instead batch was reading branch content.
I am just glad I could find this issue. Now, it could be because I am the unlucky one, but, this is what made me look more deeply at the DEF tenant and pipeline steps on a more intimate level, so, yeah, it was annoying, but, yep it was worth it. 🙂
After initial connectivity is proven and core data was being pushed to Salesforce from Sitecore, we are on to the next step which is attacking custom implementation that would be needed to meet our end goals and requirements. It was sigh of relief that the connector is working and yet deep suspense by the end of this as I was aware of the next adventures. I will continue this blog series to depict the journey that happened next.